It’s December again! Last year I fried my brain doing Blogmas and swore I’d never do it again. Now it’s January 17th and I’ve decided to do Twelve Days of Christmas. Yes, you read that correctly. It’s January 17th. I’ve decided I’m going to get on top of this whole thing really early! So this is the first post of Twelve Days of Christmas, where I’m going to do a new blog post every two days until Christmas Eve. That means we’re breaking the usual Monday & Thursday plus Tuesdays for videos pattern – blogs in December are every two days! Or at least, they are up until Christmas Day, which inconveniently falls on a Monday. So ordinary twice-a-week blogging starts again on Christmas Day.
Anyway. Day one of Twelve Days of Christmas. As usual, there will be more of an element of cold and snow and ice than Christmas, probably. That said, today I’m going to make a decoration for my tree.
When I was in Norway once, probably in Bergen in 2012, I bought a cute little decoration to hang on the Christmas tree. It’s a little felt nisse, a troll- or elf-like creature that pops up in Scandinavian culture and literature and especially at Christmas. I bought it because it’s cute but when I got home, it occurred to me that I can probably replicate it fairly easily.
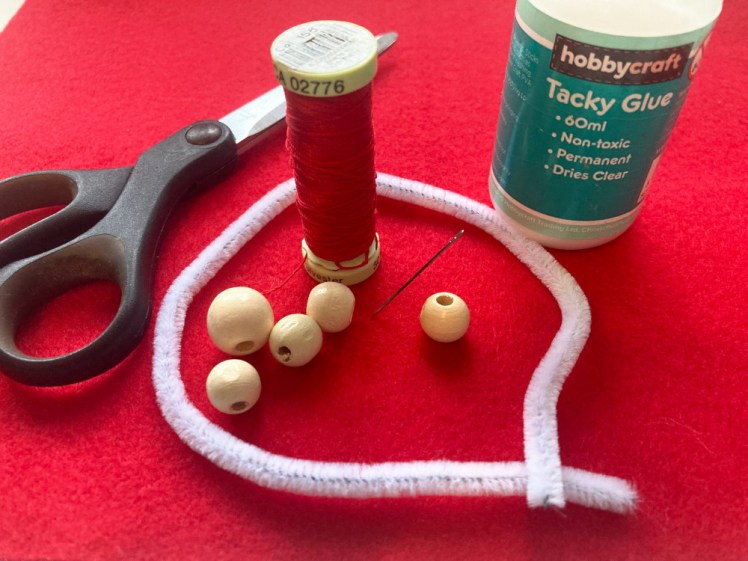
You will need:
- Four small wooden beads for hands and feet. Mine are about 1cm in diameter, which is bigger than I thought they were.
- One medium wooden bead for the head. Mine is about 14mm in diameter.
- One pipecleaner – actually, you’ll cut up the pipecleaner and won’t use the full length
- Paper for making a robe template
- Scrap of felt, preferably in red but you can make it in whatever colour you like. White for an angel or something earthy like green, brown or grey would work particularly well too
- Thread to match the felt
- Sewing needle – I like a small sharp one. This is a bit fiddly so try to use the smallest needle you can manage
- Scissors
- Glue
- Optional – wire cutters to cut the pipecleaner. You can saw through it with a pair of scissors if you don’t have any but it’s probably not great for the blades
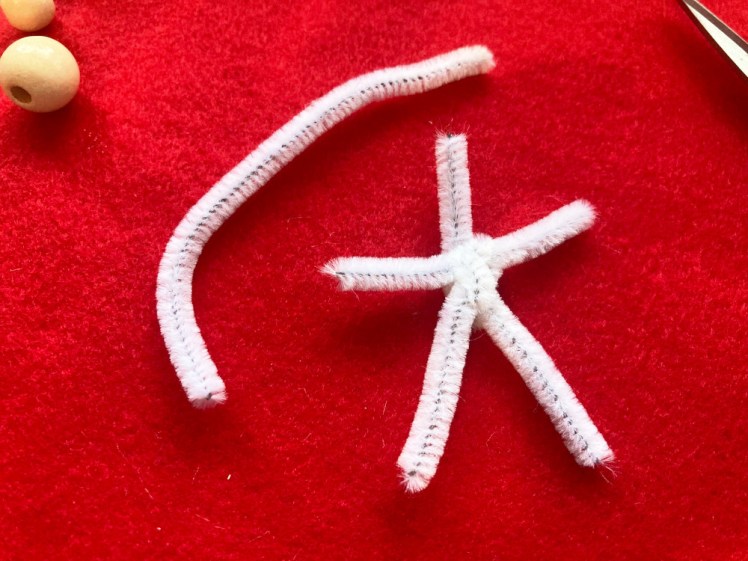
Make the skeleton
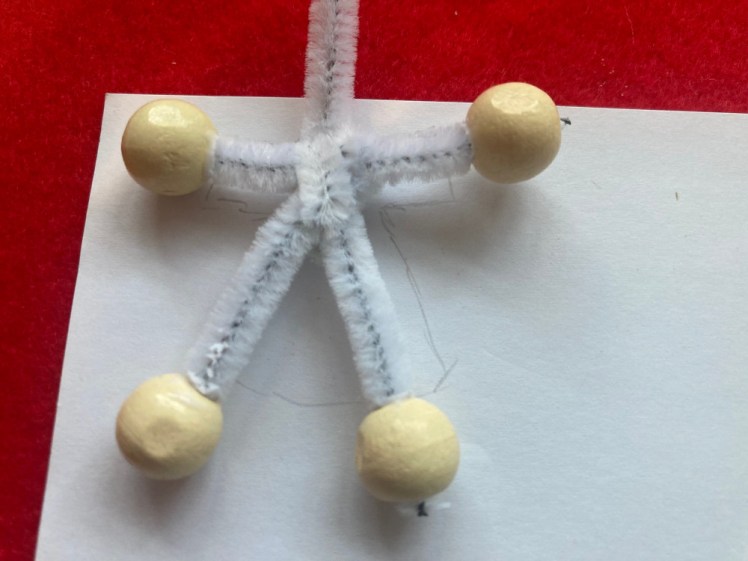
First, you need to trim and twist your pipecleaner until you make it into the shape of a body, with sharp ends where you can put the head, hands and feet. I’d cut a short length for the arms and a slightly longer length for the legs. Fold the leg piece in half over the middle of the arm piece. Cut another piece for the neck and wrap that around the legs and arms. Make sure they’re long enough to put the bead on but also to leave enough room to actually have arms and legs. The neck doesn’t matter so much, as long as there’s room to pop on the head. Put some glue on the ends of the pipecleaners if you want and push on the beads for hands and feet – the head will come later, otherwise you’re going to have trouble dressing your nisse.
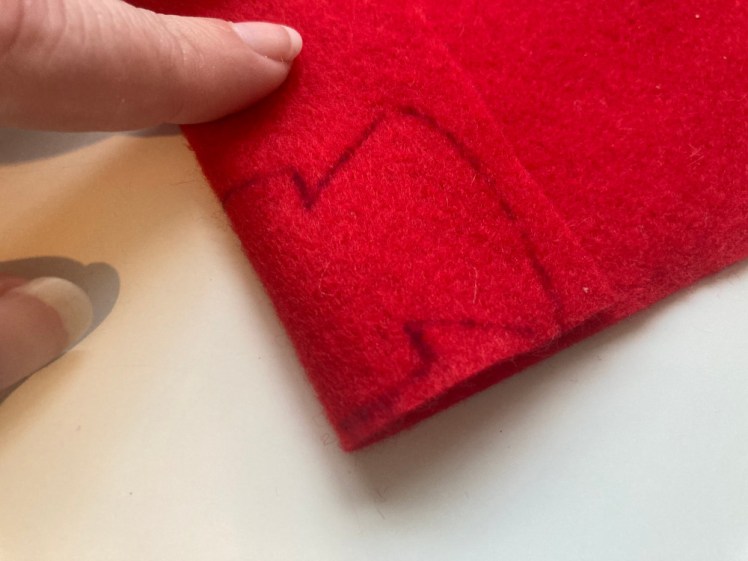
Make the robe
The exact pattern for this will depend on your skeleton. You’re going to make a little dress with long sleeves and a slightly flared hem, to allow for the fact that your nisse won’t hang with its feet neatly together. Put your skeleton on a piece of paper and draw round it to make something resembling the robe, bearing in mind that you need space to sew – don’t make it skintight. We’re not making Britney’s Oops I Did It Again catsuit here. Cut out the robe pattern.
Fold your felt over and place your pattern on with the neckline along the fold. Draw around the robe and then cut it out, making sure you cut through both sides. Don’t cut through the neckline/shoulders.
Cut a tiny hole for the neck and pop the pipecleaner through the hole. Pull the robe down over the skeleton and sew both sides together using blanket stitch. If you don’t know blanket stitch, it goes like this:
- Push the needle through the fabric and pull out the other side.
- Go back under and push through in the same direction so that there’s a loop around the fabric, rather than a flat stitch on the fabric.
- Before you pull it tight, pull your needle through that loop. It doesn’t matter which way you do it but try to be consistent.
- Repeat until you read the end.
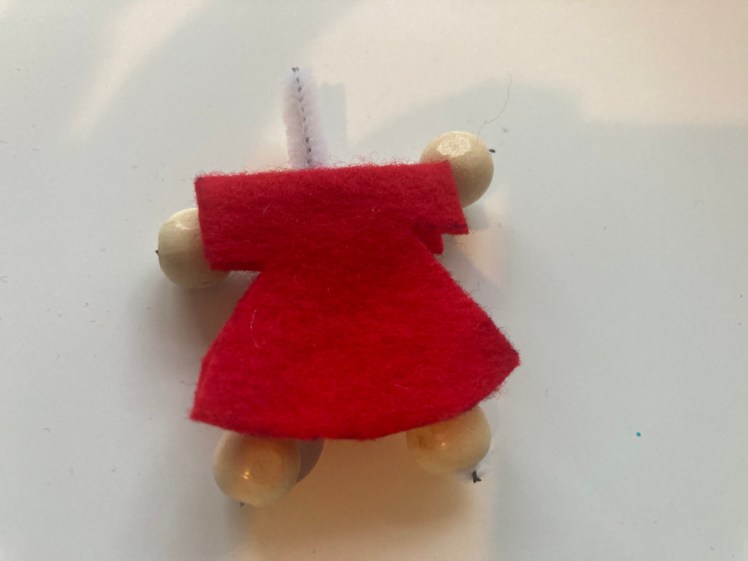
Sew under your nisse‘s arm and down the side of the robe. Leave the bottom open. Repeat on the other side.
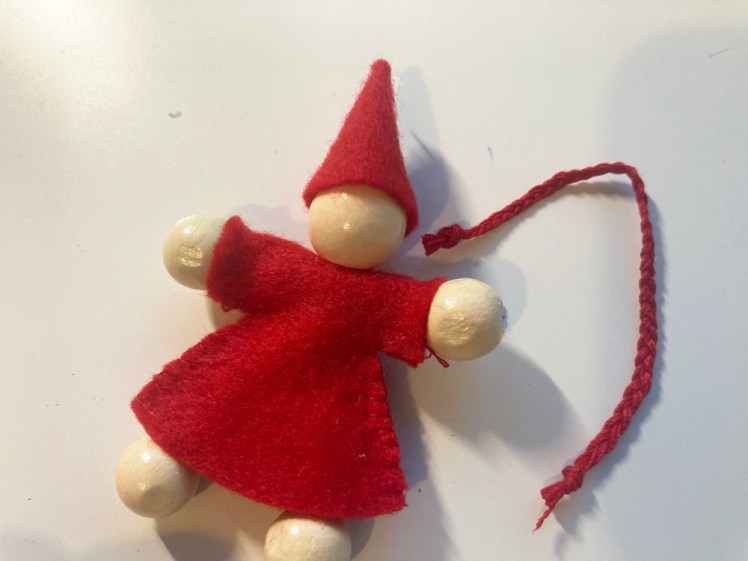
Glue/pop the head on.

Making the hat
Go back to your paper and sketch a round-bottomed cone which you’re going to roll into a 3D cone. Roll it and try it on your nisse‘s head. Does it fit around the head? Is it the right height? Adjust until you get something you’re happy with. I like the hats to be a bit shorter but my past experience in making these things says I always make them long and thin. It’s up to you exactly what shape the hat is. When you’ve got a good one, put the paper template on your felt, draw round it and cut out the felt version.

If you want to be fancy, sew this together inside out and turn it right way out. It’s small so it’s going to be fiddly and in theory, no one should see the back once it’s hanging so if it ends up not being pretty, it’s not the end of the world. Glue the hat onto the nisse‘s head.

Make a hanging loop
I’m going to mostly leave this up to you. If you have a scrap of suitable ribbon you can stitch to the top of the hat, use that. I’m going to make a plait with three pieces of thread per strand and sew that on. Previously, I’ve very simply done a loop of thread, but that’s thin and delicate. It works.
As an extra option, you can draw a face onto your nisse but my original didn’t have one, so this one isn’t going to either.
And there you go!
One Norwegian nisse ready to hang on your Christmas tree!

