Welcome to my ultimate guide to the Laugavegur Trail.
One of my favourite travel vloggers is Christianne Risman who recently launched her website, backpackingbananas.com. Among other things, she has a store with a Google Maps Backpacking Colombia legend, which I thought was an amazing idea. I’m working on an Iceland one but at the moment it looks like putting everything I want to on that map is going to be just a bit too big. It may turn into two three maps.
But I created a Laugavegur Trail one, just for you. This one’s free because I couldn’t justify charging money for it. You can open it out to full size using the little square brackets icon in the corner to explore it properly and you should be able to open it on your phone (go to the Saved icon at the bottom and then the Maps list on the far right).
I’d like to emphasise something I put in the description – this is not for navigation! The route itself is approximate. If you want to walk across a fairly featureless lava field for four days, you’ll need a far more reliable method of mapping. Allow me to recommend the Mál og menning Island Serkort 04 (Landmannalaugar/Þórsmörk/Fjallabak) map (1: 100 000), the TerraQuest Iceland Adventure map (1:75 000) or a professsional guide. I miss OS when I’m in Iceland. No one does good maps like the OS Explorer series. Do not use Google Maps to navigate this trail.
What this map is for is to show you the approximate route and what you’ll find along the way. You can read guidebooks or blogs but I think this is the closest you’ll come to digitally walking along it. I was going to do the trail again this year but you know how this year’s plans turned out. But if I do it again next year, I’ll expand on this map – with some stuff on day two, for a start. I was put in the car for day two, which is why there’s so little information.

For a start, I’ve marked each day in a different colour. That means the approximate route and all sorts of extras. What’s the name of that river you’ve just crossed? Well, here it is on the map, marked by a wavy river symbol. Where might be a good place to stop for lunch? Oh, there at the knife and fork symbol. What are the river crossings actually like? They’re marked with a fish symbol and accompanied by a picture – although rivers in the Highlands can change by the day and it isn’t necessarily going to be exactly how it was for me. But it’ll give you an idea.

As well as rivers and mountains and lunch stops, I’ve marked the route with pictures where I can so you can have an idea of what it all actually looks like. It’s one thing saying “Yeah, you cross a black lava desert on day three” but does that mean much to anyone who hasn’t seen such a thing? Well, now you can have a look at the landscape. You can look at the huts & campsites too. I’ve marked them in a different colour again and written up what you might need to know about them. You can find out the easy way at which hut it’s best to brush your teeth in the kitchen and what to do if it’s too windy to camp at Álftavatn.
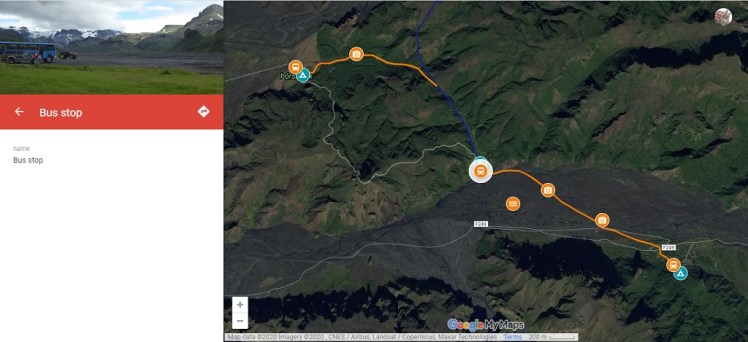
Finally, I’ve marked practicalities, by which I mean facilities at each end. Bus stops, snack stops, other campsites, hot springs etc. I hope you’ll find my map useful (but not for navigation!!) or entertaining and keep an eye out for the Ultimate Guide to Iceland, coming eventually when I’ve fitted about 10,000 points on one poor map.
If you’d like to know what it’s actually like to walk the Laugavegur Trail, I have my diary from 2018 right here.
