A couple of weeks ago, my mum happened to spot a “peg loom weaving workshop” on Facebook, mentioned to me that it sounded like the sort of thing I might be interested in and I booked onto it, with very little idea of what I’d actually booked, only that it would be educational and interesting in one way or another.
It was held in an off-grid “classroom” on the edge of the woods at the top of a hill. I don’t think a single student made it up there without either getting lost or assuming they must be lost. It’s a great place – it’s a kind of barn used as a creative space, it’s got actual flushing toilets and electricity (well, enough to power lights and a microwave; and there’s a generator that somehow creates grey water for the toilets), it’s surrounded by trees and bluebells and wild garlic and there’s a regular coppicing community that meets here to build fences and whatnot. This was unrelated to the group except that Stephanie, our instructor, has recently joined in order to be able to hire out the space for workshops.

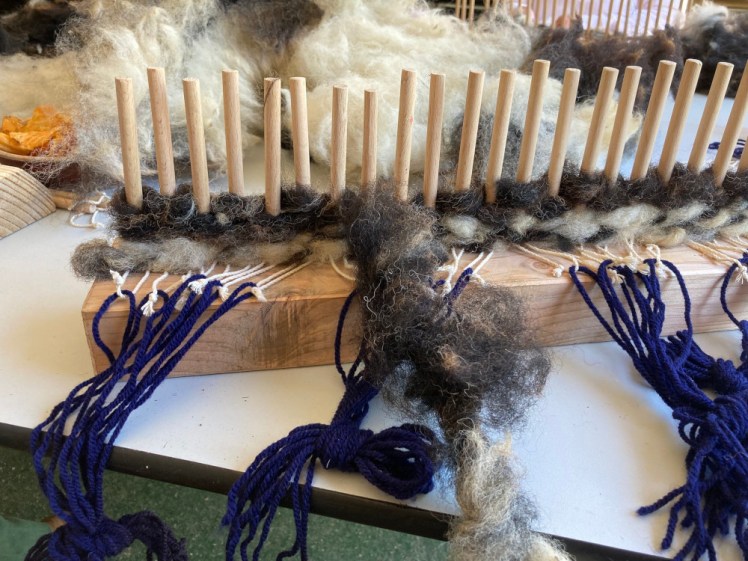
Peg loom weaving comes under the heading of heritage crafts, a traditional craft traced back not actually as far as I would have expected. I think Stephanie has found mentions of it going back to the sixteenth century, which feels surprisingly recent. The loom is a piece of wood with a number of pegs in it, with lengths of wool in this case used as warps, the cross pieces. We were going to use raw fleece fresh from the shearer as the wefts. You’re limited in width by the width of your loom but you can keep going as long as you’ve still got warps. If you’re doing a big project, your warps probably need to be a foot or so longer than you’re expecting to need – oh, let’s be realistic, they always need to be longer than you expect.

Our looms had 24 pegs, spaced an inch or so apart. We could choose to make our piece as wide or as narrow as we liked – long narrow ones make good scarves but we really had our eyes on making small rugs or sit mats or dog beds. I opted to use the full width of my loom. Traditionally, the warps are threaded through holes in the bottom of the peg but this is fiddly and Steph had seen videos online of people tying loops through their pegs and then threading the warps through the loops and that worked very well – might have saved a certain mishap in the group if we’d gone straight for the pegs but it did make life easier on the whole.

Stephanie had an entire rubble bag full of fleece. Jacob’s fleece, soft and a mix of brown and white. As I said, it’s fresh from the shearer, it’s still got bits of straw and bits of dirt in it but it’s not properly filthy, unlike the wet brown curly thing produced from another bag which allegedly stank to high heaven. I didn’t get too close to it. You pull a bit of the fleece off to use for weaving, preferably a fairly long fairly straight piece – a “noodle”, like taking a length of wool, only before it’s been processed into the kind of yarn we’re more accustomed to. There were a few small patches of colour in the fleece and my initial reaction was to think the hints of pink were drops of blood but they’re not, they’re the paint used to mark the sheep. Contrary to the internet’s opinion, shearing doesn’t hurt the sheep. It’s not in the farmers’ interest to harm their sheep, especially if they want to sell the fleece because they can’t sell it if it’s full of blood. This is just where the sheep has had an extreme haircut, right back to the bare skin.
You tie your first piece on and then you weave it in and out of the pegs, twisting as you go to keep it a bit neater and make sure it all stays reasonably well tucked in. Fleece is “sticky” – not just with lanolin, the nature oils produced in the sheep’s skin, but in that the wool itself is barbed. That’s how felting works; the wool sticks to itself, especially if it’s wet or soapy. Essentially, we were “felting” one end of a noodle to the start of the next. You just rough it up a little, twist it and it stays together. But fleece is very forgiving and it doesn’t actually mind if you just put the next piece in. It’ll grab onto it, especially once you’ve got a layer above and a layer below.

Speaking of lanolin, the fleece feels quite clean at first but as you work, your hands begin to feel a bit oily. First it feels well-moisturised, then they get past that and start to feel filthy. As the workshop went on, I began to find bits of brown filth accumulating on the heel of my hand and the side of my fingers and when I’d tied the last knots and went to wash my hands, it took a hot minute and two applications of soap to stop brown water pouring off them.
The bit I couldn’t quite fathom was what was going to happen when we got to the top of the pegs, which are only four or five inches tall. Well, what happens is that you remember whether the piece of fleece you’re currently working with is going to go around behind or in front of the last peg and then you take each peg in turn out of its hole, slide the weaving off the peg and onto the warp, put the peg back in and move on to the next one. You have to make sure every peg goes back into the correctly hole, otherwise your warps end up twisted and that makes it harder to slide it down. Then you start all over again, weaving and twisting in and out of the pegs until they’re full up again.
Ok, so I’d figured out now moving it onto the warps but I couldn’t quite see how the second lot of weaving was going to marry up to the first. And it turns out you just push the second lot on top of the first and because fleece is so forgiving and because it sticks to itself, by the time you’ve slid it down, you have no idea where the join was.
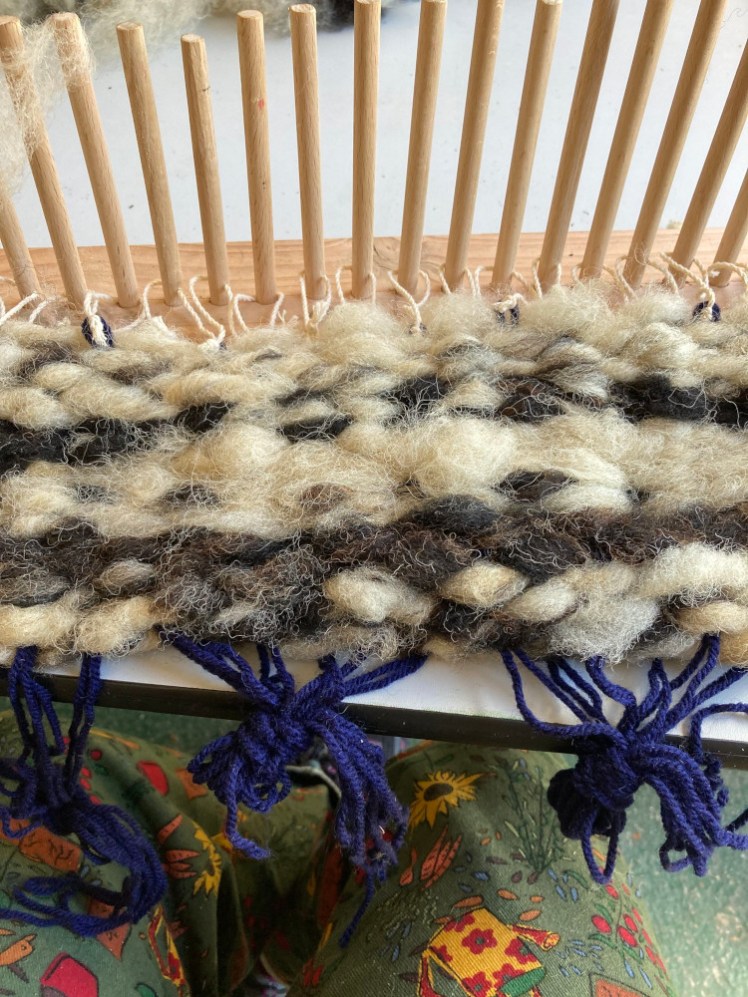
I was doing mine a lot tighter than the rest of the group. A lot of my fleece was twisting into pieces that were far too thin and trying to weave in extra to thicken it up didn’t quite seem to be working but for all that, it looked like it was going ok. I was pushing it down as I went along and the combination of regular compression and thin fleece was making it look a bit like a nice neat brick wall while it was on the loom. Some of the rest of the group weren’t doing it quite as tightly as me and theirs looked a lot softer and fluffier. We were constantly surprised, throughout the whole workshop, that five people with the same loom and the same fleece were producing five completely different pieces of work. None were better, none were worse, it’s just different tensions, different twists.
Stephanie had said that it doesn’t matter which way you twist the fleece as long as you’re consistent and none of us were consistent and it actually didn’t seem to matter – or not in our little amateur pieces, anyway. I’d get halfway along a row and realise I was twisting in the opposite direction to how I’d been twisting earlier, or that I was putting in six twists to hold the fleece together tightly enough to get it round the pegs when she’d said one for loose and maybe up to three to make it tight. I guess it depends how much fleece you’ve actually got in your noodle and what it takes to turn it into something weavable.
I’d had brief thoughts about weaving my mat in stripes, since we had both brown and white fleece. However, it seemed easier to just grab whatever was in easy reach. In the first half, a lot of that was white so after a while, I went deliberately looking for brown, then brown that was in good noodle-able condition seemed to run short and I went back to white and by the end, I had quite a lot of brown. The effect, to my surprise, was fairly stripy. I was just weaving in new colour whenever I ran out of old, there was no effort to start at one end or the other and yet it did come out pretty stripy.
Stephanie advised us to leave about half an hour to tie off our mats at the end and… we didn’t. That said, mine didn’t take all that long to do. We’d tied our warps in bundles, partly to stop getting so tangled (the fleece will happily grab woolly ends and twist it into the bundles) and partly to make sure we couldn’t accidentally push our work right off the ends. Now we had to untie them. They come in pairs, two to a peg because they’re looped around the loop of string threaded through the bottom. You take the first and second pairs and tie them together in an overhand knot. If you have enough left, you can leave it on as tassles but I didn’t, so when I got home and had some proper scissors, I trimmed them down. Same for third and fourth pair and so on. Some of them were very short, which made it difficult – see what I said about leaving more warp than you expect to need? – but you can push the fleece weaving back up the warps to give you more room to knot and then it’ll slide down afterwards. You do the same at the top, only you have to cut them free of the string loops first. Again, you can push the weaving down and let it pull back up once it’s tied.
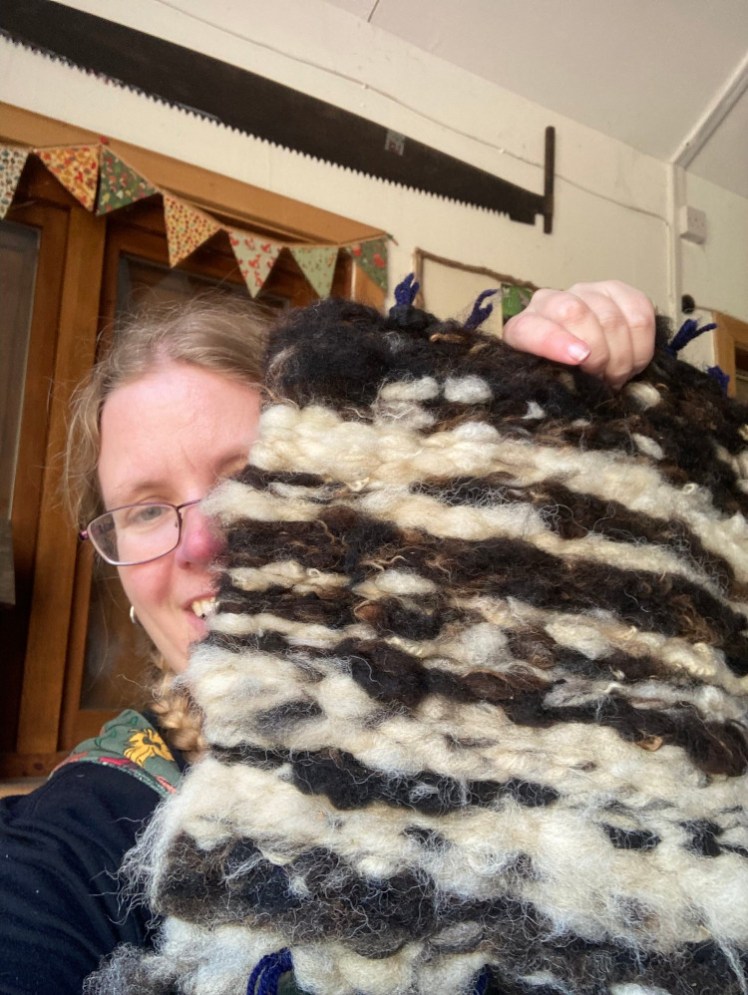
Mine came out pretty good. They all came out pretty good. Catherine, who you may know from this post, had had some kind of accident that we initially took as having got two pegs the wrong way round the first time she took her weaving off the pegs but which turned out to be that she had three warps threaded on one peg somehow, which meant her mat was tighter than planned in the middle, making her top edge v-shaped but that’s fixable by just tying the other ones tighter to pull the rest of the mat into alignment.

I think for beginners, we did pretty well. Stephanie had a little bit of corkscrew-curly fleece which I think was Shetland, and everyone else opted to weave in a couple of layers of that but I preferred to stick with Jacobs from beginning to end because I thought I preferred it to be consistent. I still think I was probably right but I also think an entire mat made from that curly fleece would be adorable.
You don’t have to limit yourself to a sitting mat. You can make an entire rug, Stephanie had a sleeping bag made from two large pieces, you can make decorative wall hangings or whatever else you can envision from making your own flat piece of fabric. We had the option to buy the looms. I was tempted but I refrained. I already have an axe and a spoon-knife which I haven’t used since, plus the best part of 20kg of willow in the garage. I do not need a loom. I am never going to be able to get a fresh fleece from a shearer. You can use thick fluffy yarn, leafy stuff, fabric scraps (Anne of Green Gables’ rag rugs are calling me), so you don’t have to use raw fleece but for now, I’m being strong. No loom for me.

Now I need another camping trip. I want to sit outside on my handmade peg-woven sitting mat, poking the fire with the poker I blacksmithed myself last year, stirring my food with the wooden spoon I carved myself the year before. Next up, I guess I need to learn to make baskets out of all that willow (I’ve done a lot of stars on a variant of a peg loom) and I can add that to my heritage craft camp kit.
